


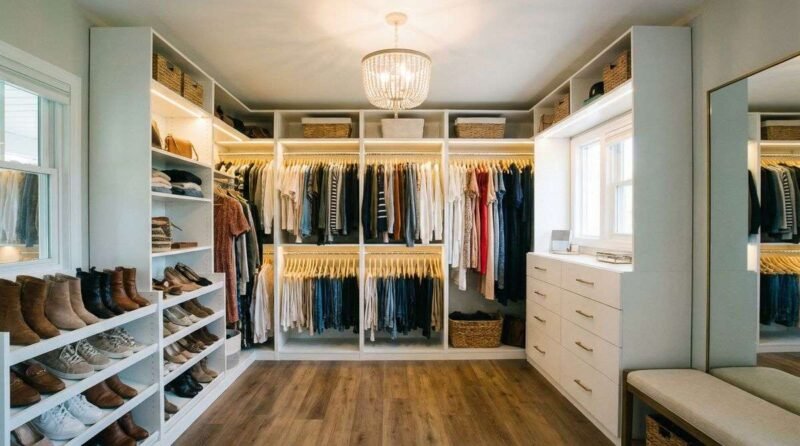
Many homeowners dream of a perfectly organized, highly functional closet space, but the high costs often deter them. However, a custom closet is not exclusively a luxury item. With careful planning and DIY skills, you can create a beautiful and practical storage space without emptying your wallet. This comprehensive guide will walk you through the entire process, from planning and material selection to step-by-step construction, helping you upgrade your closet, eliminate clutter, and embrace a more efficient lifestyle.
Why Choose DIY for Your Closet Organizer?
Opting for a DIY closet organizer provides significant cost savings by eliminating labor fees and allowing for budget-friendly material choices. It also offers unparalleled personalization, enabling you to design a storage solution that perfectly fits your space and meets your specific organizational needs, a level of customization standard systems cannot match.
Cost Efficiency: How DIY Significantly Reduces Expenses
The primary costs of a custom closet stem from design fees, materials, and professional installation. By choosing the DIY route, you eliminate the hefty labor charges and gain greater control over material costs. Sourcing and cutting the materials yourself allows you to select the most appropriate options within your budget, keeping the overall expenditure manageable. Compared to professional custom services, a DIY approach can save you a substantial amount of money, allowing you to achieve higher value for less.
Personalized Design: Meeting Your Unique Needs
Commercially available closet organization systems are often standardized and may not perfectly fit the unique dimensions of your closet or your personal storage habits. The greatest advantage of a DIY custom closet is its high degree of flexibility. You can tailor the internal structure based on the types of clothing you own, such as long dresses, suits, t-shirts, shoes, and accessories, as well as their quantity and frequency of use. This includes customizing the height of hanging rods, the number and spacing of shelves, and the dimensions of drawers, ensuring every inch of space is utilized effectively.
Planning Your Dream Closet: From Measurement to Design
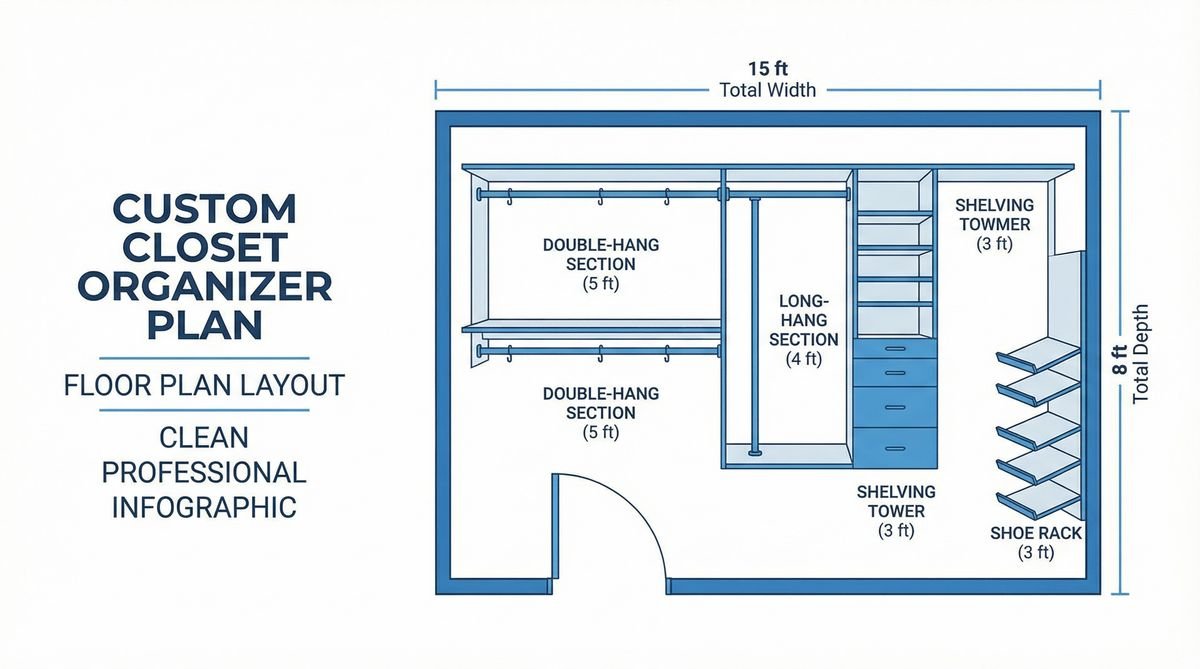
Planning a dream closet starts with precise measurements of your space to create a detailed floor plan. Optimize the layout by maximizing vertical storage with multi-level rods and adjustable shelves, especially in smaller closets. Design the internal structure based on your specific clothing types to ensure functionality and ease of access.
Precise Measurement: The Secret to Closet Space
A successful custom closet begins with precise measurements. Start by using a tape measure to determine the width, depth, and height of your closet. It is crucial to take multiple measurements at different points to account for any unevenness in the walls. Record all dimensions and consider obstacles such as door frames, baseboards, and any elements that might affect the internal structure. Draw a detailed floor plan of the closet, marking all dimensions and fixing points, which will serve as the foundation for your subsequent design and material cutting.
Layout Optimization: Maximizing Every Inch
The layout of your closet should prioritize functionality and convenience. For small spaces or irregularly shaped closets, vertical space is a valuable resource. Consider using multi-level hanging rods, adjustable shelves, and stackable drawers to maximize storage capacity. These small closet organization tips are essential for an affordable closet makeover. Corner spaces can be optimized with rotating hangers or L-shaped shelves. Additionally, the space behind the door can be utilized by installing hooks or small storage bags. Plan the flow reasonably to ensure that accessing items is neither crowded nor inconvenient.
Design Principles: Customizing Internal Structure by Clothing Type
Different types of clothing require different storage methods. Long garments, such as dresses and coats, need higher hanging rod space. Short garments, like shirts and pants, can utilize double-layer hanging rods. Folded clothes are suitable for shelves or drawers. Shoes can be placed on slanted shoe racks or in individual shoe boxes. Accessories, such as belts, ties, and jewelry, require specialized drawer dividers or hooks. During the design phase, categorize your clothing and allocate appropriate storage areas for each type, ensuring the internal structure of the closet perfectly aligns with your lifestyle.
Material and Tool Selection: Balancing Budget and Practicality
Selecting the right materials and tools is crucial for a budget-friendly DIY closet. Affordable materials like MDF, plywood, and laminate each offer distinct benefits in cost and durability. Basic tools such as a drill, saw, and level are essential for the project, ensuring a smooth and successful construction process.
Budget-Friendly Materials: Comparing MDF, Plywood, and Laminate
Choosing the right materials is key to controlling your budget and understanding custom closet material costs. Medium-Density Fiberboard (MDF) is an affordable option with a smooth surface, easy to cut and paint, but it has poor moisture resistance and average load-bearing capacity. Plywood offers higher strength, durability, and better moisture resistance than MDF, but it is slightly more expensive, and edge treatment may require more effort. Laminate typically consists of MDF or particleboard covered with a decorative surface; it offers various appearances and is easy to clean, but the edges are prone to damage. Select the most suitable material combination based on your budget, the closet’s environment, and your durability requirements.
Essential Tool List: Easy for DIY Beginners
The tools required to build a custom closet organizer system are not overly complex, making it accessible even for DIY beginners. Basic tools include a tape measure, pencil, level, power drill with screwdriver bits, saw (hand saw or circular saw), sandpaper, screws, and wood glue. If your budget permits, consider purchasing an impact driver, laser level, and pocket hole jig, which can make the work more efficient and precise. Safety is always the top priority, so be sure to wear safety goggles and gloves.
Step-by-Step Construction Guide: From Foundation to Finish
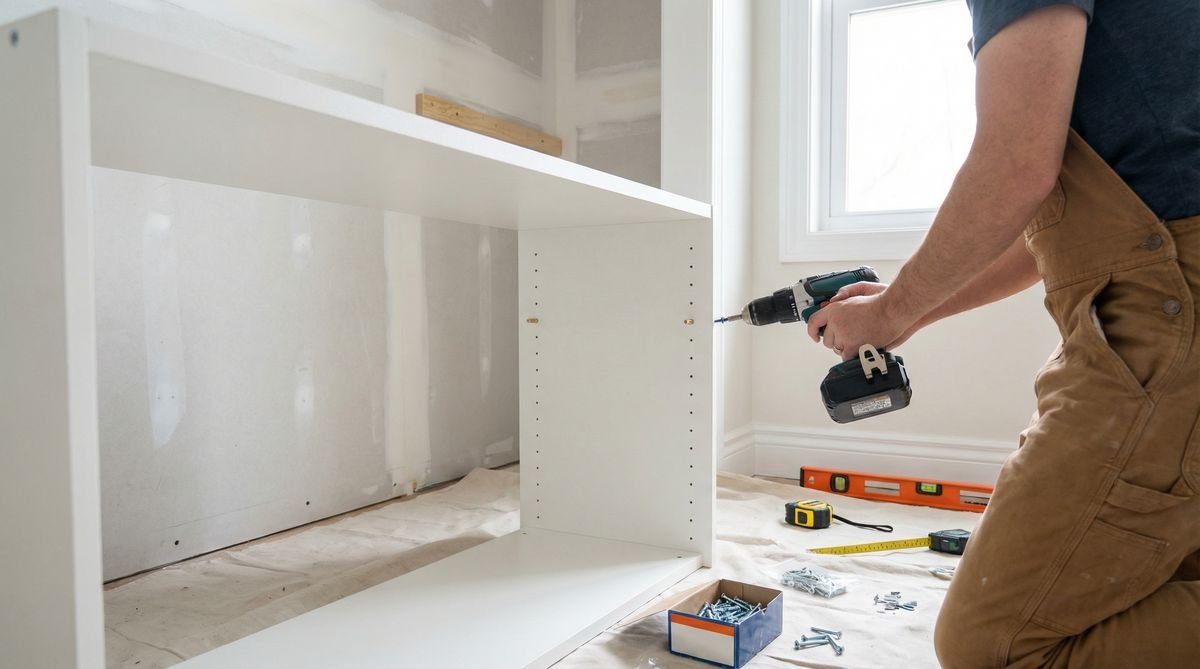
The construction process involves building a stable frame by securing support cleats to wall studs, followed by a DIY closet shelf installation. Enhance functionality by adding drawers and hanging rods at appropriate heights for different garment lengths. This systematic approach ensures a sturdy and practical custom closet organizer built to your specifications.
Building the Frame and Shelves: Stability is Key
First, based on your design plan, mark the positions of the hanging rods and shelf support cleats on the closet walls. Use a level to ensure the marked lines are horizontal. Secure the wooden support cleats (usually 1×2 or 1×3 inch wood strips) to the wall studs using screws to ensure they are firmly attached. If the wall lacks studs, you will need to use drywall anchors. Next, place the pre-cut shelves onto the support cleats and secure them from below with screws. For longer shelves, add vertical supports in the middle to prevent sagging.
Installing Drawers and Hanging Rods: Enhancing Functionality
Drawer units can be purchased pre-made or assembled yourself. Install the drawer slides on the closet side panels and the sides of the drawers, ensuring the drawers glide smoothly. The installation height of the hanging rods should be determined based on the length of the clothing. Typically, long garments require a height of 60 to 70 inches, while short garments can be divided into upper and lower tiers, each about 40 to 48 inches high. Use metal rod brackets to secure the hanging rods to the side panels or support cleats, ensuring they can bear the weight of the clothing.
Common Mistakes and How to Avoid Them
Avoid common DIY pitfalls like inaccurate measurements, which lead to rework, and underestimating load-bearing needs, which can compromise safety. A key to a successful homemade closet storage solution is designing with flexibility in mind, allowing for future adjustments as your storage requirements evolve over time.
Inaccurate Measurements: The Foundation of Avoiding Rework
One of the most common mistakes is inaccurate measurement. Even an error of a few millimeters can lead to material waste or installation difficulties. To avoid this, always measure at multiple points and use tools like a laser distance meter to improve accuracy. Before cutting materials, double-check the dimensions. Remember the principle: measure twice, cut once.
Ignoring Load-Bearing Capacity: Ensuring Structural Safety
Many DIYers underestimate the load-bearing requirements of a closet, resulting in sagging or even collapsing shelves. To avoid this, consider the weight of the clothing during the design phase and choose materials with sufficient thickness and strength. For longer shelves, add middle supports. Secure the support cleats to the wall studs or use heavy-duty anchors to ensure all connection points are robust enough.
Lack of Flexibility: Considering Future Needs
Fixing all structures permanently at once can make future adjustments difficult. To avoid this, use adjustable shelf and hanging rod systems whenever possible. Utilize detachable connectors so you can make adjustments as your needs change in the future. A modular design is also a good choice, allowing you to add or remove components without completely dismantling the system.
Smart Accessories and Upgrades: Elevating the Closet Experience
Elevate your custom closet with smart accessories that enhance organization and convenience. Pull-out racks for pants and belts, integrated LED lighting for better visibility, and drawer dividers for small items can transform your space. These simple upgrades add a touch of luxury and make daily routines more efficient.
Beyond basic shelves and hanging rods, many smart accessories can further enhance the functionality and convenience of your closet. For example, pull-out pant racks, tie racks, and belt racks can neatly organize accessories. Built-in LED lighting systems can illuminate the interior of the closet, making it easier to find items. Drawers with dividers can help organize underwear, socks, and jewelry. Consider installing a full-length mirror, which is both practical and adds a sense of space. These small upgrades can make your custom closet more complete and user-friendly.
Long-Term Maintenance and Sustainability: Keeping Your Closet Fresh
Ensure the longevity of your DIY closet with regular maintenance. Periodically wipe down all surfaces to prevent dust buildup and check that all hardware is secure. For wooden components, applying a protective finish can prevent wear and tear. Regularly reassess your storage setup to ensure it continues to meet your needs.
Building a custom closet is not a one-time task. Regular maintenance and cleaning are key to keeping it in good condition. Periodically wipe down the shelves and internal surfaces to prevent dust accumulation. Check all connectors for looseness and tighten them promptly. For wooden materials, you can regularly apply wax or protective oil to extend their lifespan. Furthermore, as the quantity and style of your clothing change, periodically evaluate the storage efficiency of your closet and make necessary adjustments and optimizations to ensure it always meets your needs.
Frequently Asked Questions
Q: Is a DIY custom closet really more cost-effective than buying a pre-made system?
A: Generally, yes. DIY can save you high labor installation fees and brand premiums. By sourcing materials yourself, you can choose more affordable options, thereby significantly reducing the total cost. However, this requires you to invest time and effort and possess some basic DIY skills.
Q: How can I maximize storage space in a small closet?
A: The key is to utilize vertical space. Install multi-level hanging rods, adjustable shelves, stackable drawers, and over-the-door storage. Using slim hangers and vacuum storage bags can also effectively save space. Additionally, regularly decluttering unnecessary clothing is the most direct and effective way to free up space.
Q: What basic tools and materials are needed to build a custom closet organizer system?
A: Basic tools include a tape measure, pencil, level, power drill, saw, sandpaper, screws, and wood glue. Common materials include Medium-Density Fiberboard (MDF), plywood, and laminate. The specific choice depends on your budget and durability requirements.
Q: How should I design the internal layout of the closet based on my clothing types?
A: First, categorize your clothing, such as long garments, short garments, folded clothes, shoes, and accessories. Then, plan appropriate storage areas for each type: long garments need high hanging rods, short garments can be hung on double tiers, folded clothes are suitable for shelves or drawers, and shoes and accessories require specialized storage solutions.
Q: What are some common design mistakes in custom closet organizer systems?
A: Common mistakes include inaccurate measurements, ignoring load-bearing capacity, designing without flexibility, failing to fully utilize vertical space, and inadequate lighting. The key to avoiding these mistakes lies in detailed planning, choosing the right materials, ensuring structural stability, and leaving room for future adjustments.
Conclusion: Build Your Exclusive Closet and Enjoy an Organized Life
Building a custom closet organizer system on a budget is a highly rewarding DIY project. It enhances the functionality and aesthetics of your closet, bringing convenience and comfort to your daily life. From precise measurement to clever design, and from material selection to construction, every step reflects your effort. Now, embark on your closet transformation journey, build a dream storage space, and enjoy the beauty of an organized life.