

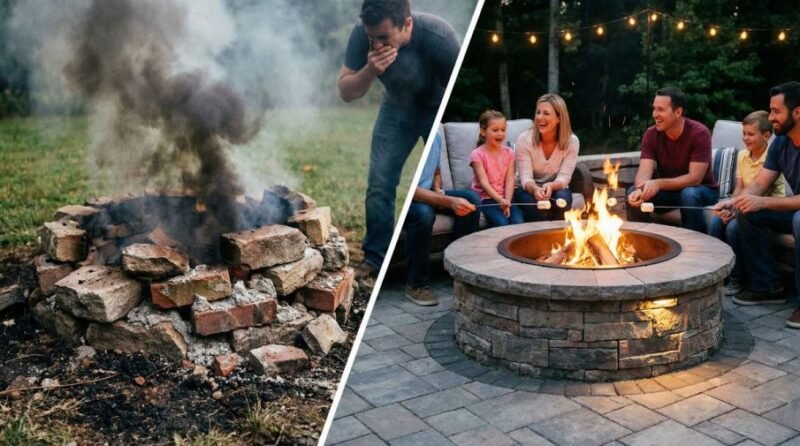
A backyard fire pit transforms an ordinary outdoor space into a gathering place. The flickering light, the warmth on a cool evening, the natural draw of an open flame — these are experiences that no patio furniture purchase can replicate. The even better news: building a simple, attractive fire pit with pavers is a one-weekend project that requires no masonry experience and costs between $150 and $400 in materials.
This guide covers how to build a simple outdoor fire pit with pavers from start to finish: site selection, materials, step-by-step construction, and the safety considerations that most DIY guides mention only as an afterthought but that genuinely matter for long-term safe use.
1. Site Selection and Safety Clearances
Answer Capsule: A fire pit must be placed at least 10 feet from any structure, fence, or overhanging tree branch. The ground must be level and non-combustible — gravel, concrete, or compacted dirt. Never place a fire pit on a wooden deck or directly on grass. Check local ordinances before building, as some areas require permits or prohibit open burning entirely.
Site selection is the most safety-critical decision in the entire project. The National Fire Protection Association (NFPA) recommends a minimum 10-foot clearance from all structures and combustible materials. This includes fences, sheds, overhanging tree branches, and patio furniture. In practice, 15 feet is a more comfortable working distance that also provides better smoke dispersal.
The ground beneath and around the fire pit should be non-combustible. A gravel pad extending at least 3 feet beyond the fire pit perimeter is the most common and practical solution. Gravel does not burn, drains water effectively, and provides a clean, defined surface that visually frames the fire pit area.
2. Materials and Tools
Answer Capsule: A standard 36-inch diameter paver fire pit requires approximately 36–40 retaining wall blocks or fire pit pavers, a bag of construction adhesive, gravel for the base, and a metal fire ring insert (optional but recommended). Total material cost ranges from $150 to $400 depending on paver type and whether a metal insert is used.
| Material | Quantity | Estimated Cost | Notes |
|---|---|---|---|
| Retaining wall blocks or fire pit pavers | 36–40 blocks | $80–$150 | Use fire-rated blocks, not standard concrete pavers |
| Pea gravel or crushed stone | 0.5 cubic yards | $30–$50 | For base layer and surrounding pad |
| Construction adhesive (high-temp) | 1–2 tubes | $10–$20 | Bonds upper ring layers |
| Metal fire ring insert | 1 (36″ diameter) | $40–$80 | Optional but extends paver life significantly |
| Landscape fabric | 1 roll | $15–$25 | Under gravel to suppress weeds |
| Tamper | 1 (rental) | $20–$30/day | For compacting gravel base |
A critical materials note: standard concrete pavers are not suitable for fire pit construction. Regular concrete can crack and spall (explode) when exposed to the high temperatures of an open fire. Use pavers specifically rated for fire pit use — these are made from fire-resistant aggregate and are sold at most home improvement retailers alongside fire pit kits.
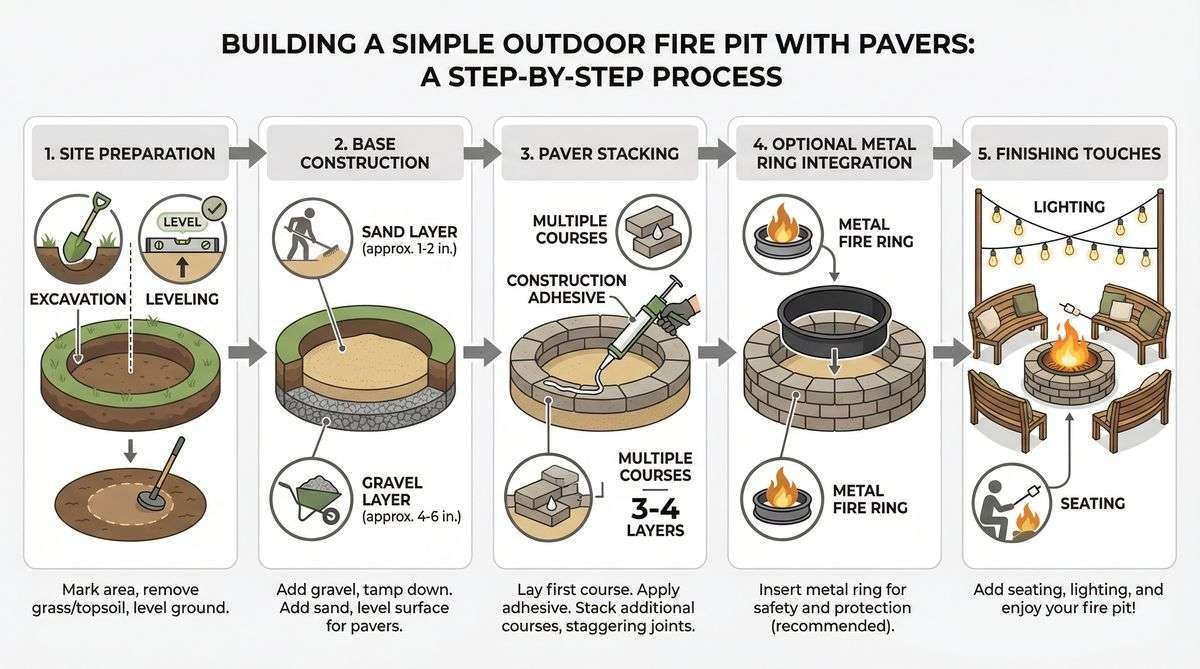
3. Step-by-Step Construction
Answer Capsule: Construction involves five stages: marking and excavating the site, laying a compacted gravel base, dry-laying the first ring of pavers to confirm the circle, stacking and adhering subsequent rings (typically 3 rings for an 18-inch wall height), and filling the interior with gravel. The entire process takes 4–6 hours for a first-time builder.
Mark the fire pit location using a stake and string as a compass. Drive the stake at the center point, tie a string to the length of the desired radius (18 inches for a 36-inch diameter pit), and walk the string around the stake while marking the ground with spray paint or flour. This creates a perfect circle.
Excavate the interior of the circle to a depth of 6 inches. Fill with 4 inches of compacted gravel, then 2 inches of pea gravel on top. The gravel base provides drainage and prevents moisture from building up beneath the fire pit, which would accelerate paver deterioration.
Dry-lay the first ring of pavers without adhesive to confirm the spacing and circle shape. Adjust as needed. Once satisfied, apply a bead of high-temperature construction adhesive to the top of the first ring and set the second ring, offsetting the joints by half a block (running bond pattern). Repeat for the third ring. Allow the adhesive to cure for 24 hours before the first fire.
4. Why a Metal Fire Ring Insert Matters
Answer Capsule: A steel fire ring insert placed inside the paver ring protects the pavers from direct flame contact, dramatically extending their lifespan. Without an insert, pavers are exposed to temperatures exceeding 1,000°F during active fires, causing cracking and spalling within 1–2 seasons. A $40–$80 insert can triple the life of the paver structure.
The metal insert also contains ash and embers more effectively, making cleanup easier and reducing the risk of embers escaping the fire pit perimeter. Stainless steel inserts are the most durable option; standard steel inserts are adequate but will rust over time if not stored under cover during wet seasons.
Frequently Asked Questions
Is a permit required to build a backyard fire pit?
Permit requirements vary by jurisdiction. Many municipalities allow small recreational fire pits without a permit, provided they meet minimum setback requirements and use only clean wood (no treated lumber, trash, or yard waste). Some areas prohibit open burning entirely during dry seasons or high fire risk periods. Checking with the local fire marshal or building department before construction is always recommended.
What type of wood burns best in a paver fire pit?
Seasoned hardwoods — oak, hickory, maple, and ash — produce the most heat, the least smoke, and the longest-lasting coals. Wood should be seasoned (dried) for at least 6 months before burning. Softwoods like pine burn faster and produce more creosote and sparks. Never burn treated lumber, painted wood, or composite materials, as these release toxic fumes.
Should a fire pit be covered when not in use?
Yes. A fitted metal cover or a waterproof fire pit cover protects the pavers from water infiltration and freeze-thaw damage in cold climates. Water that seeps into paver joints and then freezes expands, accelerating cracking. A cover also prevents debris accumulation in the fire pit interior, which can create unexpected flare-ups when the fire is lit.
Conclusion
Building a simple outdoor fire pit with pavers is one of the most rewarding weekend projects available to a homeowner. The materials are affordable, the construction requires no special skills, and the result — a permanent outdoor gathering space — delivers years of enjoyment.
The two decisions that determine long-term success are site selection and materials. Choosing a location with proper clearances and using fire-rated pavers with a metal insert ensures the fire pit remains safe and structurally sound for many seasons. Everything else is just stacking blocks in a circle — which, it turns out, is more satisfying than it sounds.
References
- National Fire Protection Association (NFPA). “Outdoor Burning Safety.” 2024.
- This Old House. “How to Build a Fire Pit.” Updated 2025.
- Belgard. “Fire Pit Construction Guide.” 2025.
- Family Handyman. “DIY Fire Pit with Pavers.” 2024.