


Removing a popcorn ceiling, traditionally a messy and arduous task, has been revolutionized by specialized vacuum attachments. This guide details how to efficiently and cleanly remove popcorn ceilings, enhancing your home with minimal disruption.
Understanding Popcorn Ceilings and Asbestos Risks
Answer Capsule: Popcorn ceilings, common in homes built between the 1950s and 1980s, may contain asbestos if installed before the 1980s. Prior asbestos testing is crucial for safety and to determine the appropriate removal method.
Popcorn ceilings, also known as acoustic ceilings, were popular for their textured finish, hiding imperfections and offering some sound dampening. However, their aesthetic is now largely outdated. More importantly, older popcorn ceilings may contain asbestos, a hazardous material banned in the US in 1978. Exposure to asbestos fibers can cause severe respiratory diseases. Therefore, before any removal, professional asbestos testing is mandatory to ensure safety and guide the removal process.
Essential Tools and Materials for a Clean Removal
Answer Capsule: Effective, mess-minimised popcorn ceiling removal requires specific tools: a powerful HEPA-filtered shop vacuum, specialized vacuum scraping or sanding attachments, and comprehensive safety gear to protect against dust and debris.
Successful vacuum-assisted popcorn ceiling removal demands specific tools and materials for efficiency, cleanliness, and safety. The core of this modern method is integrating a vacuum system directly with the removal tool. Key items include:
- Safety Gear: Goggles, N95/P100 respirator, gloves, and protective clothing are essential to prevent inhalation of dust and debris.
- Shop Vacuum: A powerful wet/dry shop vacuum with a HEPA filter is critical for capturing fine dust. A larger capacity (16+ gallon) reduces emptying frequency.
- Specialized Vacuum Attachment: This is pivotal. Options include:
- Vacuum Scraper Attachment: Features a wide blade with integrated vacuum ports, ideal for unpainted ceilings.
- Drywall Sander with Vacuum Port: An orbital drywall sander connected to a shop vac, more effective for painted or stubborn textures, though it may require more skim coating.
- Pump Sprayer: For controlled wetting of the ceiling, preferably one usable at various angles.
- Plastic Sheeting & Painter’s Tape: Heavy-duty plastic (4-mil+) to cover floors, walls, and furniture, secured with tape.
- Step Ladder or Scaffolding: For safe and stable access to the ceiling.
- Drywall Compound & Taping Knives: For repairing imperfections after removal.
- Large Sponge: For damp sanding to smooth the ceiling.
- Primer: A high-quality, stain-blocking drywall primer to seal the ceiling before painting.
- Ceiling Paint: Your chosen finish paint.
- Optional: Fabric Softener: Can be added to water to aid in softening the popcorn texture.
Choosing the right vacuum attachment depends on your ceiling’s condition. Scrapers suit unpainted ceilings, while sanders are better for painted or stubborn textures, despite potentially requiring more surface repair.
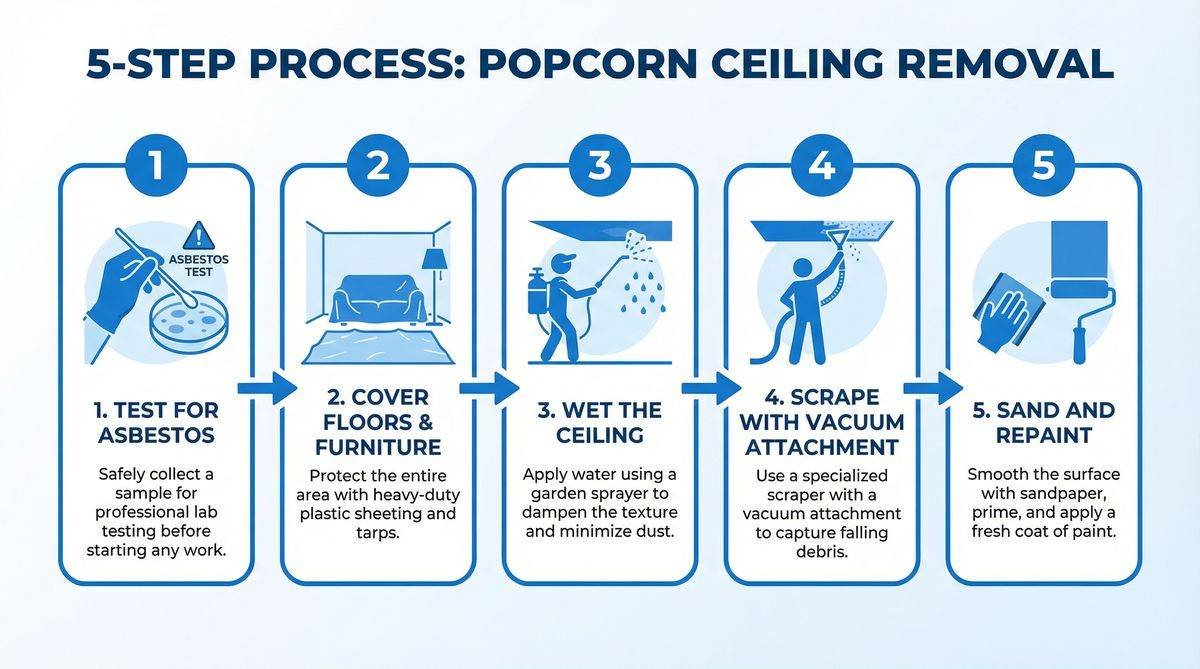
Step-by-Step Guide to Vacuum-Assisted Popcorn Ceiling Removal
Answer Capsule: This systematic process involves thorough preparation, controlled wetting, vacuum-assisted scraping/sanding, and meticulous post-removal repairs and priming, ensuring a smooth, paint-ready ceiling with minimal mess.
Vacuum-assisted popcorn ceiling removal significantly reduces mess but requires careful execution. Follow these steps for a clean and effective outcome:
Preparation: Protecting Your Space
Thorough preparation is crucial for safety and minimal cleanup. Remove all furniture, decorations, and light fixtures. Cover the entire floor with heavy-duty plastic sheeting, extending it up the walls and securing with painter’s tape. Turn off electricity to the room. Confirm asbestos absence; if present, seek professional abatement. Always wear safety goggles, a respirator, and protective clothing.
The Wetting Process: Softening the Texture
Proper wetting softens the texture without damaging the drywall. Fill a pump sprayer with warm water, optionally adding a capful of fabric softener. Work in small 4×4-foot sections, lightly spraying and allowing 10-15 minutes for absorption. Avoid over-wetting. Test with a putty knife; if texture doesn’t easily scrape, re-mist and wait.
Scraping/Sanding with Vacuum: Minimizing the Mess
Attach your vacuum scraper or drywall sander to your shop vacuum and turn it on. For scraping, hold the blade at a slight angle with gentle, consistent pressure; the vacuum will capture loosened texture. For sanding, move the sander evenly, avoiding gouging. Work slowly and methodically, overlapping strokes. Vacuum any fallen debris before proceeding.
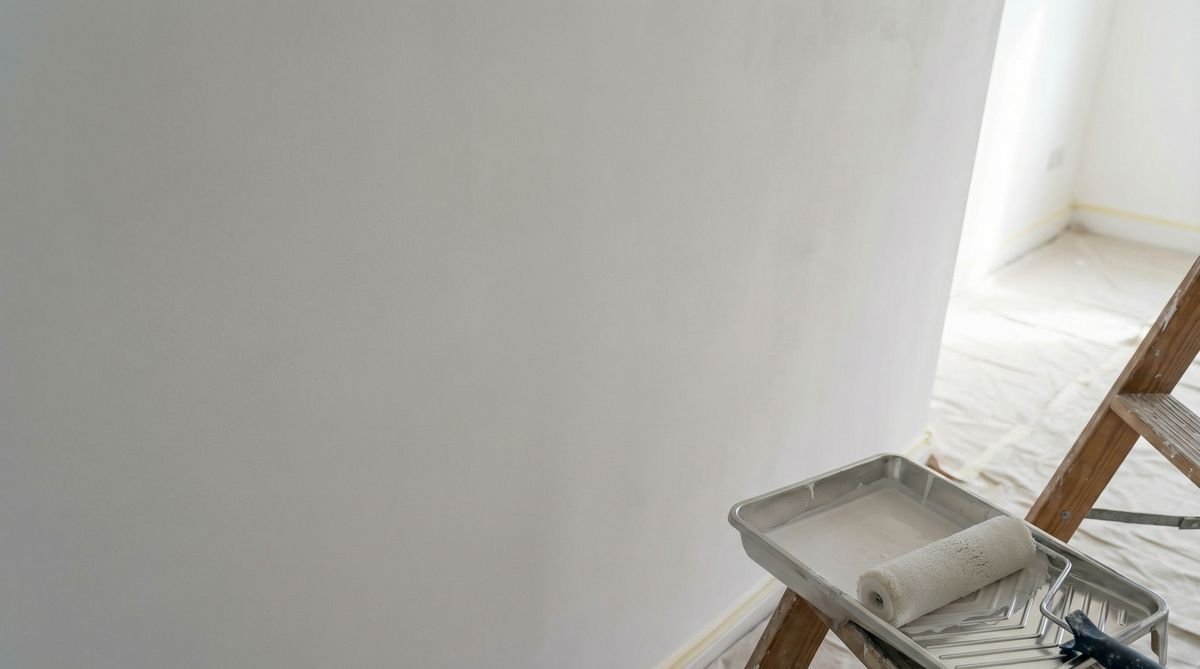
Post-Removal Finishing: Repair, Prime, and Paint
After removal, inspect for imperfections like gouges or uneven spots. Use drywall compound and taping knives to fill and smooth, applying thin, even coats and sanding lightly when dry. Apply a high-quality, stain-blocking drywall primer to seal the surface and ensure paint adhesion. Once primed and dry, your ceiling is ready for painting. Consider a paint sprayer for an even coat or a thick-nap roller for traditional application.
Common Challenges and Troubleshooting
Answer Capsule: Addressing issues like stubborn textures, drywall damage, and persistent dust involves re-wetting, careful repair, and optimizing vacuum performance to maintain a clean and efficient removal process.
Even with preparation, challenges may arise. Troubleshooting these issues saves time and frustration:
- Stubborn Popcorn Texture: If texture resists removal, it might be painted or very dry. Re-wet more thoroughly, allowing longer absorption. Fabric softener can help. For painted ceilings, a drywall sander with vacuum is often more effective, but expect more dust and potential surface damage.
- Drywall Damage: Gouges or tears are common. Repair with thin layers of drywall compound, sanding smooth after each layer dries. For deeper damage, mesh tape may be needed before compounding.
- Excessive Dust: Despite vacuum attachments, some fine dust is inevitable. Ensure a clean, properly installed HEPA filter and check hose connections. For persistent dust, consider a professional-grade dust extractor or creating negative air pressure with a box fan in a window.
- Water Stains: Treat any water stains with a stain-blocking primer before painting to prevent bleed-through.
Differentiating Modules: Beyond the Basic Scrape
Answer Capsule: Advanced techniques, such as using a drywall sander with integrated vacuum for painted ceilings and employing a two-person team for synchronized efficiency, offer superior solutions for a smoother, faster, and cleaner popcorn ceiling removal.
Beyond basic wet-scraping, specialized approaches enhance efficiency and address specific challenges:
The Drywall Sander Advantage for Painted Ceilings
Painted popcorn ceilings are difficult to wet-scrape. A drywall sander with an integrated vacuum system is ideal here. These tools aggressively remove texture while capturing dust. Use appropriate grit sandpaper (e.g., 80-grit for removal, finer for smoothing) and connect to a HEPA-filtered shop vacuum. This method is more aggressive and may require more skim coating, but it’s often the most viable for painted surfaces.
The Two-Person Team: Maximizing Efficiency
For large areas, a two-person team significantly accelerates the process. One person handles wetting and vacuum-assisted scraping/sanding, while the second follows, performing initial drywall repairs. This continuous workflow minimizes downtime, ensures prompt addressing of imperfections, and allows the primary remover to maintain focus. This synchronized effort leads to faster completion and a higher-quality finish.
Frequently Asked Questions (FAQs)
Q1: How long does it typically take to remove a popcorn ceiling with a vacuum attachment?
Answer: Time varies by room size and texture. A small room (10×12 ft) might take 1-2 days for a DIYer, including prep and cleanup. Larger areas or multiple rooms will take longer. The vacuum attachment speeds cleanup, but scraping still requires time.
Q2: Can I remove a popcorn ceiling by myself, or do I need professional help?
Answer: For asbestos-free ceilings, DIY removal with a vacuum attachment is feasible for those with moderate DIY experience. Asbestos presence mandates professional abatement. For very large/high ceilings or complex repairs, professionals ensure a flawless finish.
Q3: What’s the best way to deal with the dust, even with a vacuum attachment?
Answer: Beyond a HEPA-filtered shop vac, seal the room completely with plastic. Use an air scrubber or a box fan in a window to create negative air pressure, exhausting dust outdoors. Regularly empty the vacuum and clean its filter for optimal suction.
Q4: How do I know if my popcorn ceiling contains asbestos?
Answer: Professional testing is the only definitive method. Purchase an asbestos testing kit and send a sample to a certified lab. This is crucial for homes built before 1980.
Q5: What if I accidentally gouge the drywall during removal?
Answer: Minor gouges are common and easily repaired with drywall compound. Apply thin layers with a taping knife, allowing each to dry before sanding smooth. Multiple thin layers are better for deeper gouges.
Q6: Is it better to scrape or sand a popcorn ceiling with a vacuum?
Answer: For unpainted ceilings, wet scraping is generally preferred as it’s less aggressive and creates less fine dust. For painted ceilings, a drywall sander with a vacuum attachment is more effective. Both require careful technique to avoid drywall damage.
Conclusion: A Smoother Future for Your Home
Removing a popcorn ceiling with a vacuum attachment is a transformative project. While it requires careful preparation, safety adherence, and a methodical approach, the benefits of a smooth, modern ceiling outweigh the effort. By understanding asbestos risks, gathering the right tools, and following the removal, repair, and finishing steps, homeowners can achieve professional results with minimal mess, enhancing their home’s visual appeal and value.
References
- [1] Environmental Protection Agency (EPA). “Asbestos: Learn About Asbestos.”